 AgedWell Journal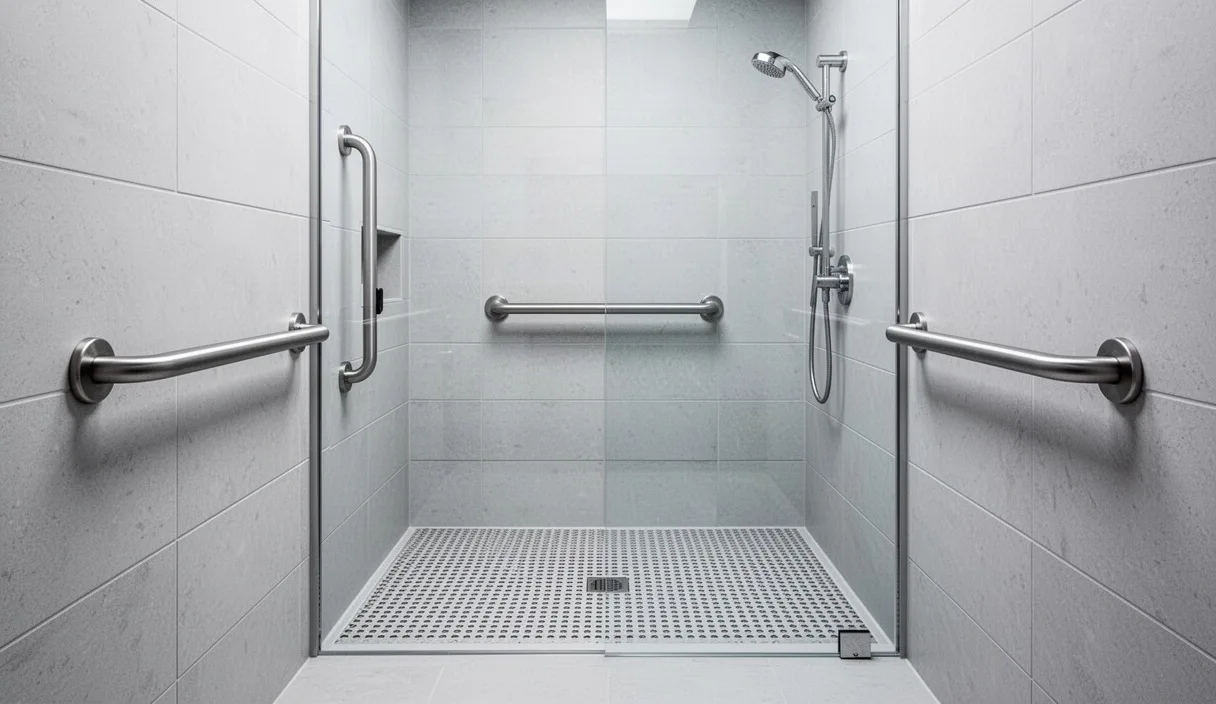

Most bathroom falls occur during routine transfers between standing and sitting. Wet surfaces, hard fixtures, and tight spaces turn a slight loss of balance into a serious injury. Porcelain tubs, stone floors, and glass doors provide zero shock absorption when an individual loses footing. Modifying this space does not require gutting every wall, but it demands precise hardware, correct load ratings, and specific placement.
Every change must prioritize physical leverage and secure contact. Slipping happens in a fraction of a second, leaving no time to grip smooth walls or loose fixtures. This guide details practical structural adjustments, exact measurements, and equipment requirements that protect physical autonomy in older adults. Where structural changes interact with plumbing, electrical lines, or weight-bearing walls, consult a licensed contractor or an occupational therapist to verify safe installations.
Mapping high-risk impact zones in standard bathrooms
Start your evaluation by walking through the room in bare feet and socks. Identify the exact points where weight shifts from two feet to one. These transition areas present the highest rate of balance loss. In an average five-by-eight-foot layout, three specific zones account for the vast majority of hard impacts: the shower threshold, the immediate perimeter of the toilet, and the floor directly outside the vanity basin.
The shower threshold requires special attention because wet feet must clear an obstacle while the body balance shifts over a narrow curb. Stepping over a standard four-inch to six-inch tub rim forces an older adult onto a single leg while shifting their center of gravity forward. If a slip happens here, the secondary impact occurs against the narrow edge of the tub wall or the metal track of a sliding door.
The area surrounding the toilet poses a different risk factor. Hip and knee weakness often causes users to drop the final three to four inches into the seat. During standing, individuals naturally lean forward to generate momentum. If handholds are absent, people instinctively grab nearby towel rings, toilet paper holders, or sink edges. None of these light fixtures can hold sudden body weight.
The vanity perimeter combines water puddles with reach demands. Leaning forward over a sink changes spinal alignment and reduces foot traction. If a toothbrush, soap bottle, or towel drops to the floor, bending down to retrieve it in a confined space causes sudden blood pressure shifts and balance disruptions. Mapping these zones clarifies where hardware must go before anyone picks up a drill.
Wall studs vs drywall anchors: weight-bearing specs
Anchor grab bars directly into wall studs whenever possible. Standard residential wall framing uses nominal two-by-four wood studs placed either 16 inches or 24 inches on center. A standard two-inch wood screw driven at least one and a half inches into structural lumber supports standard lateral and pulling forces. The Americans with Disabilities Act standards require grab bars to withstand a structural force of at least 250 pounds applied at any point. Many bariatric and residential safety guidelines suggest targeting structural support up to 400 or 500 pounds for sudden drops.
Drywall alone cannot sustain shock loads. Standard half-inch or 5/8-inch drywall crumbles under sudden vertical force when secured only with plastic expansion plugs. If you cannot align your grab bar mounting holes with a wall stud, use heavy-duty hollow-wall toggle anchors specifically engineered for safety rail mounting. Hollow-wall anchors such as stainless steel WingIts or heavy-duty snap toggles distribute force across a wider surface plate behind the drywall sheet.
| Mounting Method | Tensile Pull-Out Strength | Shear Strength Rating | Best Use Case |
|---|---|---|---|
| Direct Center-Stud (2.5-inch screws) | 350 to 450 pounds | 450 to 500 pounds | Primary shower entry, main toilet pull-points |
| Hollow-Wall Specialty Fastener (WingIt style) | 200 to 300 pounds | 300 pounds | Tiled hollow drywall where studs do not align |
| Standard Plastic Drywall Anchors | 15 to 30 pounds | 20 to 40 pounds | Never acceptable for grab bars or weight support |
| Blocking Lumber (2x6 installed between studs) | 500+ pounds | 500+ pounds | Bathroom renovations during open-wall remodel |
Locate studs using an electronic multi-scanner that detects both wood edges and live electrical wiring. When drilling into tiled surfaces over studs, use a carbide-tipped or diamond-core drill bit without hammer action to prevent cracking the tile face. If the bathroom features metal studs instead of wood, do not rely on standard wood screws. Metal framing requires specific toggle-bolt systems to keep the fastener from pulling through thin-gauge sheet metal under sudden strain.
Correct grab bar angles beside the toilet and shower
Mount grab bars to assist specific body mechanics rather than visual aesthetics. Towel rails mounted horizontally cannot substitute for tested grab bars. Grab bars should have an outer diameter between 1.25 and 1.5 inches to allow a full, closed grip for aging hands with limited finger flexibility. Ensure a clearance of exactly 1.5 inches between the bar and the wall to prevent an arm from slipping through the gap during a fall.
Install grab bars at the shower entrance in a vertical position. Mount a 24-inch bar on the door jamb or outer entryway wall, running from 32 inches to 56 inches above the finished floor. This vertical orientation gives users a steady handhold throughout the stepping-over movement, accommodating both tall and short individuals as they clear the curb.
Inside the shower enclosure, run a horizontal bar along the primary side wall at 33 to 36 inches above the floor level. This height provides a resting leverage point while standing under running water. If space allows, install a bar at a 45-degree angle along the secondary wall. An angled bar accommodates an upward pushing motion: the lower end supports the wrist while pushing up from a seated position, and the higher end offers a handhold when fully upright.
Beside the toilet, install a 36-inch or 42-inch horizontal grab bar on the nearest adjacent wall. Fasten it 33 to 36 inches above the floor, extending at least 12 inches past the front edge of the toilet bowl. If the toilet sits in an open area without a nearby side wall, install a swing-down, floor-mounted safety rail. These drop-down bars lock in the down position for sitting and standing support, then pivot up against the back wall to leave the floor clear for walking.
Non-slip flooring treatments and walk-in shower trays
Floor slickness is measured using the Dynamic Coefficient of Friction, abbreviated as DCOF. A dry, clean residential tile might register a safe rating, but soapy water drops that surface friction rapidly. The American National Standards Institute recommends a minimum wet DCOF rating of 0.42 for level interior spaces expected to get wet. For wet areas used by seniors, aim for a wet DCOF of 0.60 or higher to maintain foot stability.
Address existing smooth tiles with chemical anti-slip treatments or roll-on micro-abrasive coatings. Chemical treatments apply mild microscopic etching to ceramic, porcelain, or quarry tiles. This etching increases friction when wet without visibly changing the tile color or requiring total floor replacement. Reapply these chemical treatments according to manufacturer instructions, usually every two to three years, because mineral deposits and routine detergents gradually smooth down the etched texture.
For extensive bathroom updates, replace traditional high-rim tubs with a walk-in shower tray featuring an ultra-low threshold. Target a curb height of 0.5 inches or lower, shaped with a beveled edge. Completely curbless showers remove the tripping obstacle entirely by pitching the floor gently toward a linear drain along the back wall.
- Select unglazed mosaic tiles (two inches square or smaller) for shower floors; the frequent grout lines naturally generate grip.
- Avoid high-gloss marble, polished porcelain, or smooth granite anywhere inside the bathroom perimeter.
- Use epoxy grouts rather than standard cement grouts to resist mold growth that makes floor tiles slick over time.
- Ensure the slope toward the floor drain falls between 0.25 inches and 0.5 inches per foot to prevent puddles without destabilizing standing balance.
Shower chair criteria: rubber feet, drainage, and backrests
A safe shower chair removes the fatigue of standing on a slippery, warm surface. Standing for ten minutes in a warm environment dilates peripheral blood vessels, which lowers blood pressure and brings on dizziness in vulnerable individuals. A dedicated shower chair must remain stable when wet, support unbalanced lateral loads, and fit inside the footprint of the enclosure without wobbling.
Examine the rubber feet first. The chair legs must terminate in wide, suction-style rubber tips made of non-marking synthetic rubber. Check that the tips feature flexible drainage slits or pressure-release tabs. Solid hard-plastic caps slide easily across wet acrylic and fiberglass surfaces, making them dangerous. Wipe the feet regularly to remove soap scum, hair, and body wash residue that degrades the rubber grip against the floor.
Choose chairs equipped with slotted or perforated plastic seats. Solid flat seats allow soapy water to pool under the thighs and buttocks, increasing slip risks when shifting positions. Seat perforations channel water downward quickly. Select a model that incorporates a full backrest and built-in side armrests. Armrests provide critical leverage for pushing the body upright, reducing the load placed on the quadriceps and knees.
- Adjust the seat height so the user's feet rest flat on the shower floor with knees bent at a clean 90-degree angle.
- Confirm the chair frame uses corrosion-resistant anodized aluminum or stainless steel hardware to prevent structural rust.
- Look for a tested weight capacity rating of at least 300 to 400 pounds to handle dynamic forces when dropping into the seat.
- Position the chair so the hand-held shower wand, water valves, and soap shelves sit within arm's reach without twisting the torso.
Motion-activated floor lighting for night visits
Navigating a dark bathroom at night causes sudden disorientation. Waking from deep sleep impairs balance, and eyes take several minutes to adjust to low-light conditions. Standard overhead lighting is often too harsh, blinding the user and disrupting circadian rhythms, while turning on no lights at all invites trips over bath mats and door sills. Automated, low-level illumination solves this challenge.
Install motion-activated LED strip lights along the baseboards, beneath the vanity toe-kick, or under the edge of the floating vanity counter. Position the motion sensors along the natural walking path, roughly six to twelve inches off the floor, so they trigger the moment a foot swings out of bed or enters the doorway. Battery-operated or hardwired magnetic strip sensors eliminate the need to search for a wall switch in the dark.
Keep the light output low, between 20 and 50 lumens. This output illuminates the floor surface and outlines wall obstacles without creating high-contrast shadows. Choose a warm color temperature between 2200K and 2700K. Amber and warm white lights preserve night vision and avoid the sleep-disrupting blue wavelengths emitted by standard daytime bulbs.
Ensure the timer maintains illumination for at least three to five minutes following the last detected movement. Short 30-second timers shut off while an individual sits on the toilet or washes their hands, leaving them in sudden darkness. Mount a supplementary motion-sensor night light directly adjacent to the toilet bowl to mark the target clearly without requiring overhead lighting.
Common mistakes
Homeowners often rely on suction-cup grab bars to avoid drilling holes in tile. Suction-cup bars fail without warning. Changes in humidity, surface temperature, and grout texture degrade the vacuum seal over days or weeks. When a fall occurs, the sudden shock load breaks the suction seal instantly, causing the user to fall backward with the bar still in hand.
Another dangerous practice is using standard decorative bath mats. Fluffy rugs without slip-resistant backings act like skates on polished surfaces. Even mats with rubber backing become unsafe once the rubber backing dries out and flakes off in the laundry. If floor coverings are needed to collect water, use flat, low-profile rubber-backed mats with beveled edges, or replace them entirely with fixed non-skid floor treatments.
Mounting grab bars using standard brass screws included in general hardware kits introduces another point of failure. Always use heavy-gauge, stainless steel screws to prevent head shearing or rust degradation over time in high-moisture rooms.
Practical next steps
Begin by checking the existing fixtures in the bathroom. Test the stability of towel bars, toilet paper holders, and wall shelves by applying firm downward pressure with one hand. Remove any unstable items that could be mistaken for weight-bearing handholds during a balance loss.
Audit the lighting and thresholds today. Measure the step-in height of the shower curb, and replace worn bath mats with bare, chemically treated floors or commercial-grade, non-slip alternatives. Purchase two plug-in motion-sensing amber night lights to place along the path between the bed and the toilet as an immediate, low-cost safety upgrade.
For structural modifications, locate the wall studs around the shower enclosure and toilet. Mark stud centers with pencil lines, and measure the spans to determine whether standard 16-inch, 24-inch, or 36-inch grab bars will hit solid framing. If studs do not line up with ideal grab bar positions, or if drilling through heavy porcelain or cast iron is required, hire a licensed contractor with experience in accessible aging-in-place design.